Showing posts with label book conservation. Show all posts

Friday, September 6, 2024

 The Restoration of Letters from New York

by Audrey Sage


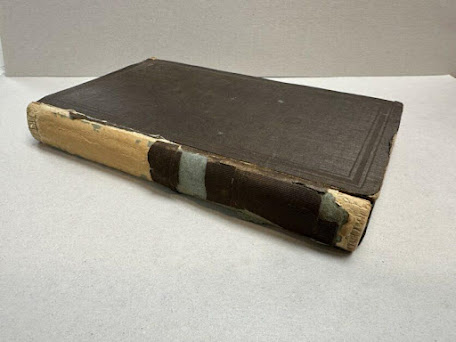
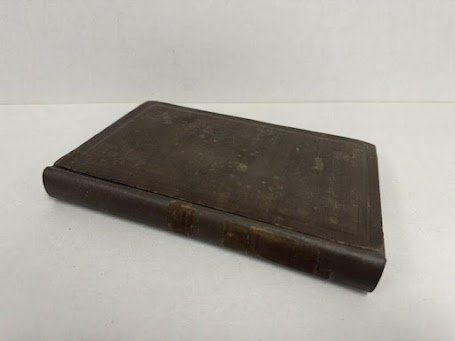
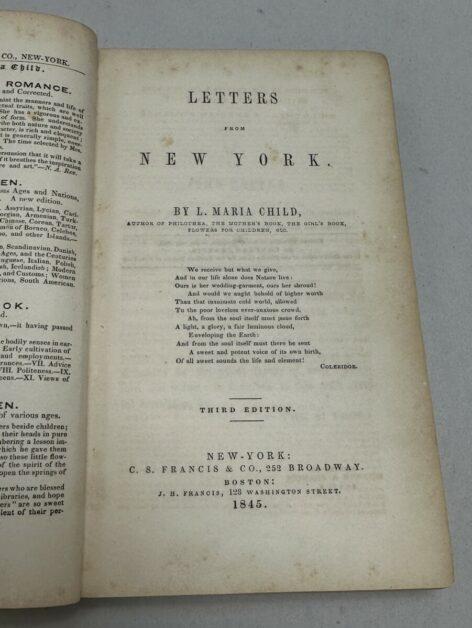
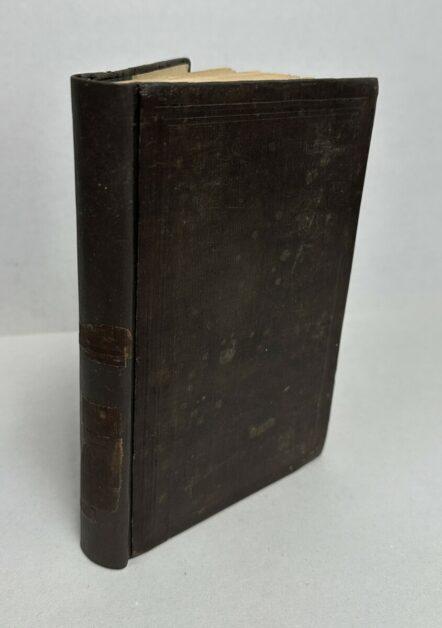
The Special Collections contains a copy of Letters from New York by L. Maria Child, which was published in 1845 by C. S. Frances & Co. in New York. Other works by L. Maria Child include Philothea: A Grecian Romance, History of Women, The Mother's Book, and Flowers for Children.

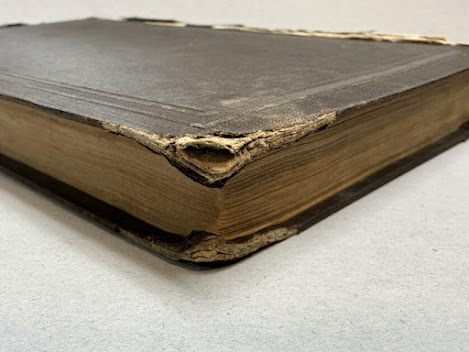
A book with a brown cover

Description automatically generated with medium confidence
Before restoration
A book with a leather cover

Description automatically generated
After restoration

An open book with text on it

Description automatically generated
Prominent author and abolitionist Lydia Maria Child began writing her "letters" from New York in August 1841 as a response to the troubling realities marking her private and public life. In particular, she was preoccupied by her editorial duties at the National Anti-Slavery Standard and dismayed by the growing sectarian spirit of antislavery reform. Collected primarily from the pages of the Standard, her literary essays on women's rights, the preaching of African American minister Julia Pell, the Crosby Street Synagogue, animal magnetism, the engineering miracle of Croton Aqueduct, and countless other people, topics, and events capture the breathless and sometimes unsettling transformation of one representative hub of national life. - University of Georgia PressA close up of a book

Description automatically generatedA close up of a book

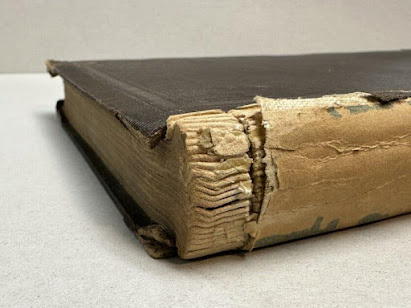
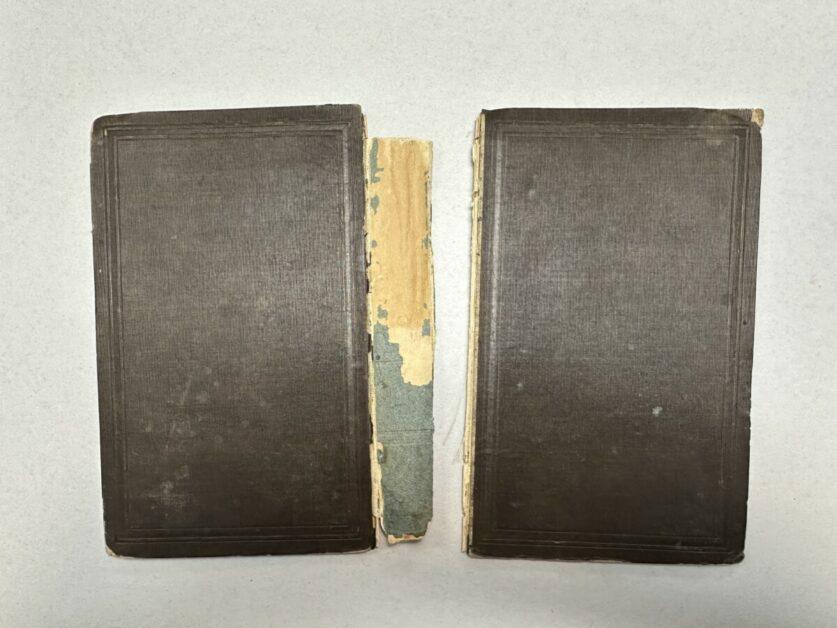
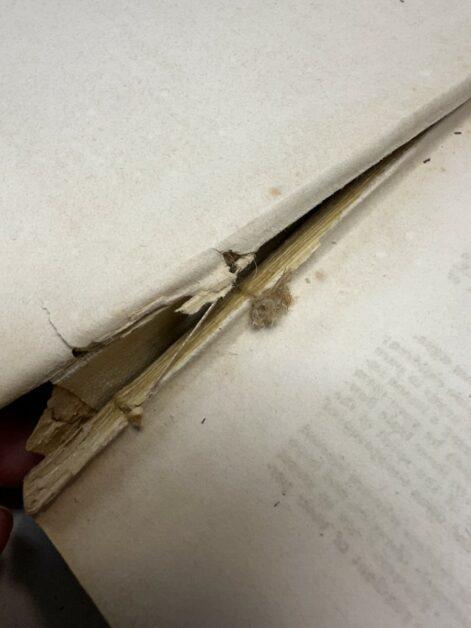
Description automatically generatedThis third edition of "Letters from New York" had become worn and in need of restoration treatment. I began the work by removing the covers from the text block in order to perform the mends necessary before I would be able to rebuild the cover. A broken book with a hole in it

Description automatically generated


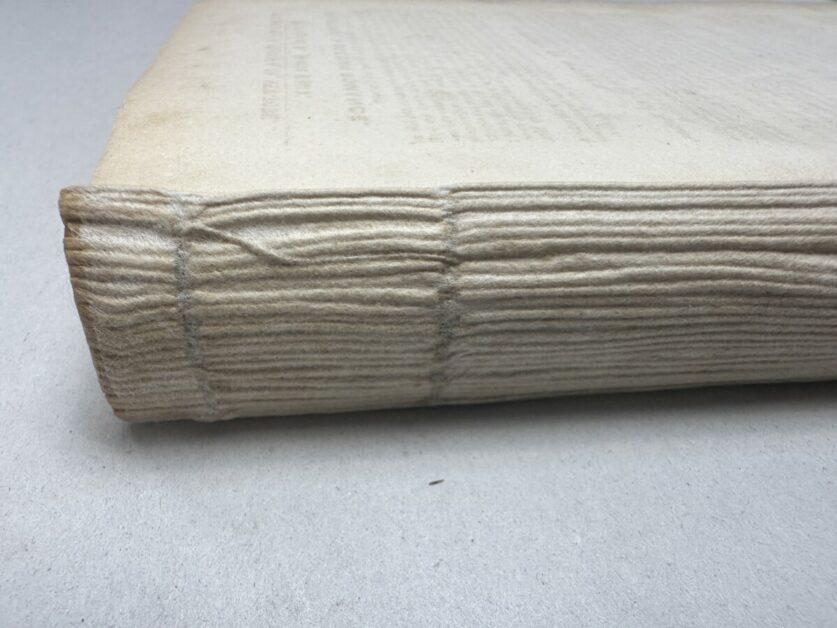
The text block signatures were somewhat loose due to the poor condition of the original adhesives, as well as the unfortunate tearing of the backing cloth. 

A close up of a book

Description automatically generatedA close-up of a book

Description automatically generated

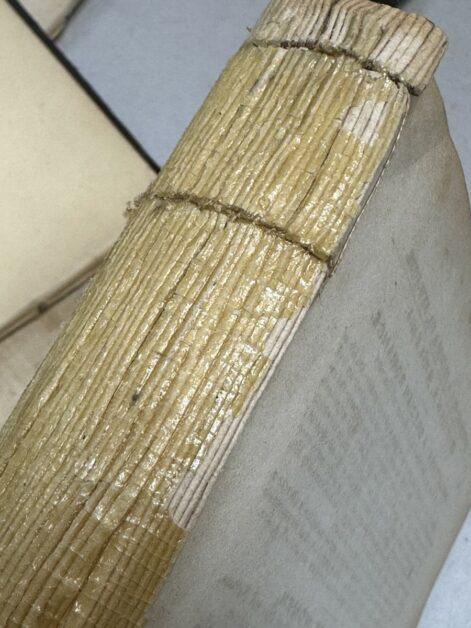
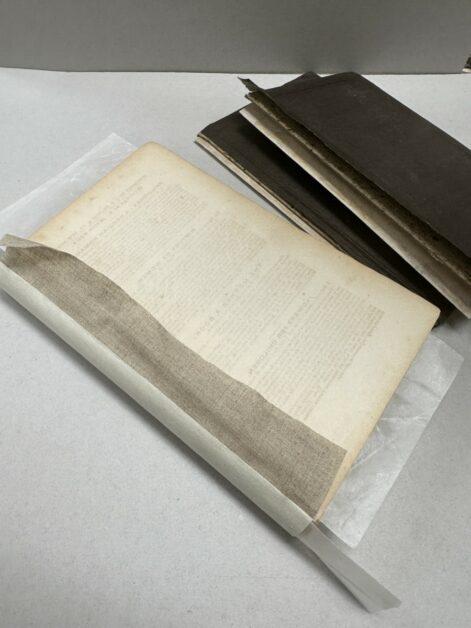
I was able to remove the old glue and apply new starch adhesive and archival mending tissue to reinforce the spine, salvaging the original sewing.

A close-up of a book

Description automatically generated

Text block spine with new starch adhesive and new backing paper reinforcement applied. Once this was complete I was able to apply new linen cloth backing to replace the damaged cloth, and a sturdy japanese paper hollow.

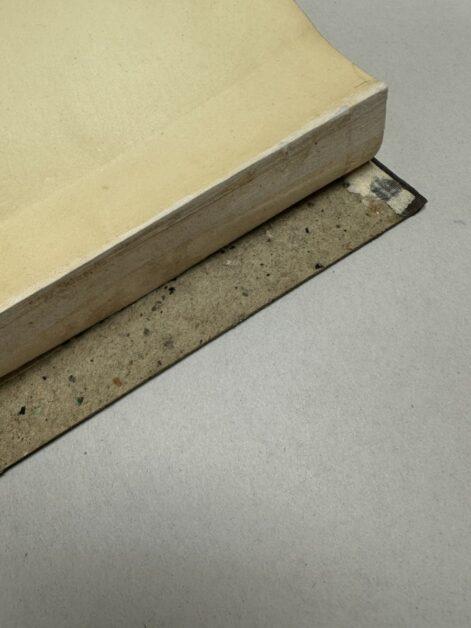
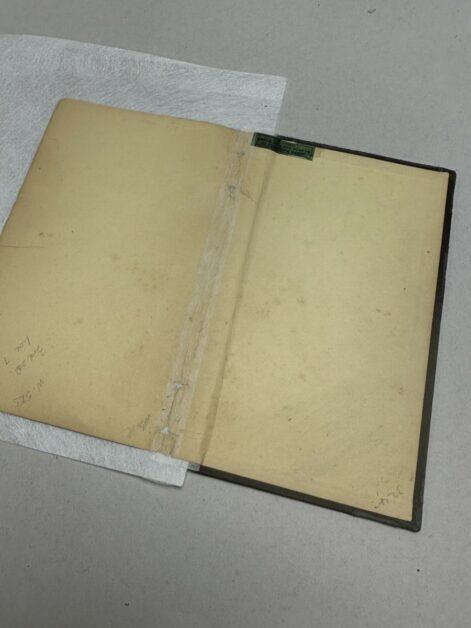
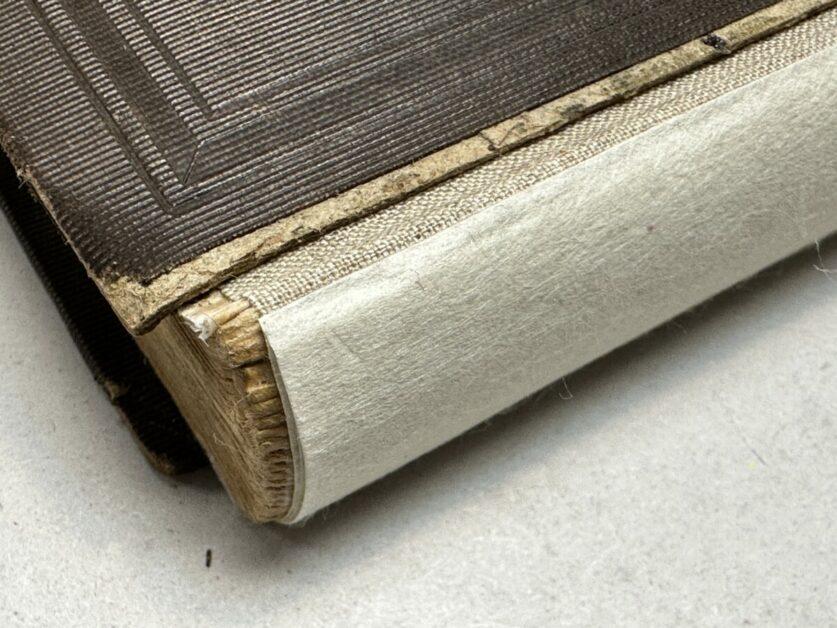
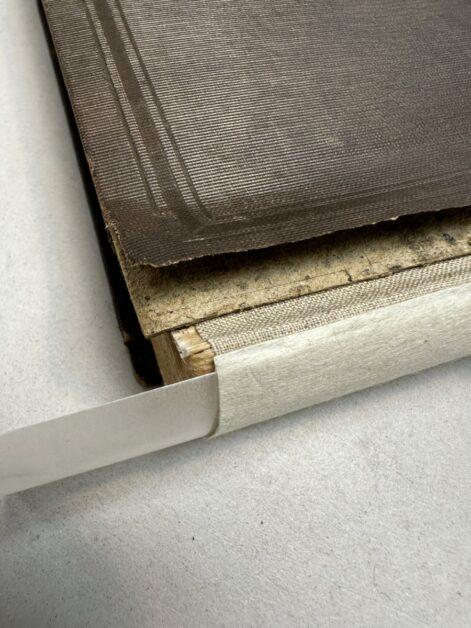
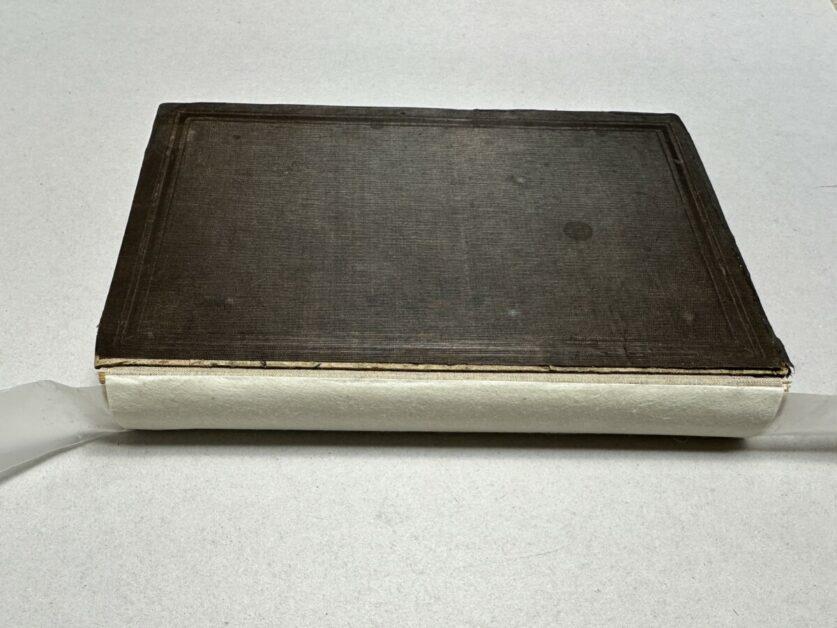
The cover boards were repaired, the damaged corners were mended and moriki paper was used to cover the areas that were missing the original bookcloth. The original endpapers could be mended and lifted from the boards to prepare for the insertion of the new backing fabric.

A close-up of a piece of wood

Description automatically generatedAn open book with a green label

Description automatically generatedA close-up of a book

Description automatically generatedA close-up of a book

Description automatically generatedClose-up of a piece of wood

Description automatically generated

A book with a white cover

Description automatically generated

Once the cover was rebuilt, the spine cleaned and rebacked, and the endsheets repaired, I was able to attach the original covers back onto the text block. With the original cover cloth lifted, I inserted a replacement spine exterior made from linen backed toned moriki paper that I was able to then further tone with additional pigments to closely match the color of the original cover material. Once this spine repair was completed and the restored book pressed, this special historical book, Letters from New York, is ready to be returned to the shelf, to be accessed and utilized by future historians, researchers and the curious reader.

A close-up of a book

Description automatically generatedAn open book with a few pages

Description automatically generated


Friday, March 19, 2021

Building a Post Binder for a 19th Century Sewing Book

Sewing Book
Models with Instructions
used by
State Normal and Industrial School
Greensboro
N.C.
1895-1896

State Normal and Industrial School (now UNC Greensboro) once offered sewing classes for the young women attending the school. Along with preparing students to be teachers, the school's Domestic Science Department was also concerned with fostering the skills necessary for women to become good wives and mothers. No doubt sewing could be a useful skill to have during the early 20th century. The Martha Blakeney Hodges Special Collections and University Archives (SCUA) is fortunate to have three of these sewing books created by students in the late 19th century. 

Three examples of sewing models sewn by hand in 1895-1896

The three sewing books were delivered to Preservation Services so that we might devise a way to keep the pages as intact as possible while also stabilizing them. The goal is for these books to be used with classes visiting SCUA. Unfortunately, the substrate pages of the albums are quite discolored and brittle due to the acidity of the paper. Nonetheless, the sewing samples are incredibly intricate and interesting, especially considering they were all sewn by hand. Though there was not much we could do in house about the condition of the substrate pages, we were able to create post binders to better protect them. We also elected to leave the metal fasteners and pins that were securing the sewing samples to the pages because the pages were too brittle to remove them.

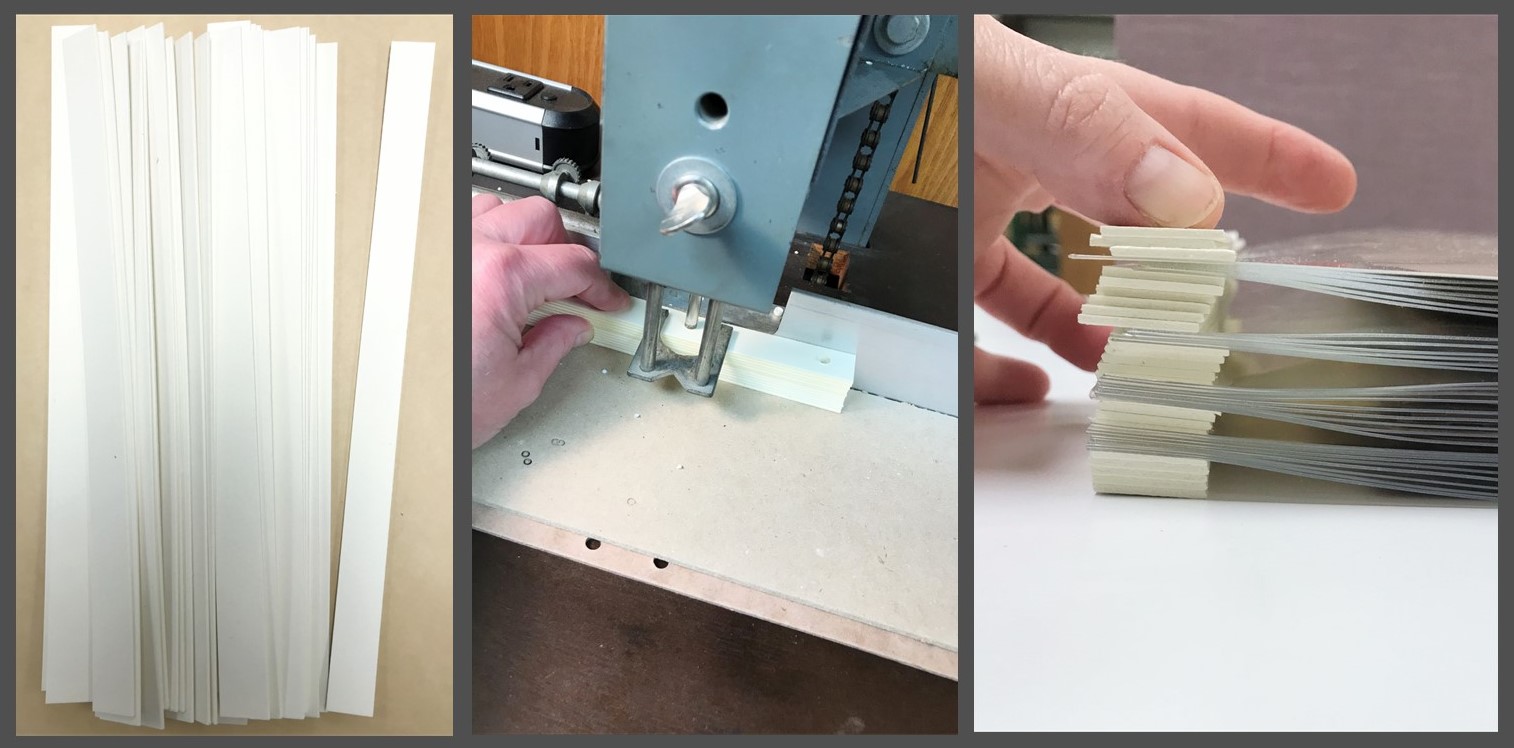
Left: Spacers cut from museum board, Center: Drilling holes with
the drill press, and Right: A preview of the spacers between the pages
Often, paper manufactured in the late 19th and early 20th century was created from wood pulp. The lignin, an organic substance that makes the cell walls in plants rigid or woody, in wood pulp contains acid that degrades the paper over time. You may have heard of the “Brittle Book Era”, which refers to this time period when paper manufacturers were under pressure to create a large quantity of paper very cheaply in order to meet the demand of the publishing industry. The wood pulp was cheaper to process into paper but resulted in very brittle paper over time. When brittle paper is torn, or more accurately “broken”, it is difficult to mend as the mend ends up being stronger than the paper being repaired and it simply breaks again along the edge of the mend. There are processes for deacidifying paper, such as washing it to remove some of the impurities and adjust the pH to a more neutral level, or spraying it with an alkaline solution to slow down the process of aging. However, there are often conservation solutions that simply are not feasible for us due to the cost or labor involved. Thus, creating post binders was the right solution for us at this time.

The assembled post binder
The sewing books’ pages were already loose and simply resting inside the sewing album covers, so disbinding was not necessary. The first step of stabilizing the pages was to put each page in a protective Mylar sleeve. This type of sleeve is often referred to as an L-sleeve because the edges are sealed along two sides in an L shape. They serve as a protective barrier both for the item inside the sleeve as well as anything it might come into contact with, such as neighboring sewing samples in this case. Once all the pages were sleeved, the next step was to drill holes near the spine edge so that the posts could be inserted through the covers and the block of pages. However, due to the thickness of the sewing samples, spacers were needed at the spine edge between some of the pages or else the spine would be much narrower than the pages which would result in a wedge shaped book that bulges open at the fore edge. Spacers of museum board (similar to mat board)  were cut to the height of the text block and drilled with a drill press (see pictures). The Mylar pages were also drilled based on the same template so that the holes will align when the binder is assembled. Custom covers were made in three pieces - a spine piece and two covers. The covers also had to be drilled. Once all the parts were prepared, the post binding was actually quite simple to assemble. The screw posts come in a variety of lengths so they can be fit to any thickness of textblock.

Additional views of the assembled post binder
Though it is common to have an extra allowance of space on the spine edge of the Mylar so that the pages can turn, these sleeves were left even larger so that the sewing book pages would not have to flex as much. The original stamped cover designs of the sewing books were removed and adhered to the front of the new post binders. Because the sleeves are not sealed along the top edge at the head of each book, custom-fitted clamshells were later built to house the binders to prevent them from collecting dust.

An open view of the post binder
The post binders are a versatile option for protecting the pages of a book. In this case, they may not be the perfect solution, but they have succeeded in stabilizing the pages and making them a bit safer to handle with a class of students. Ultimately, that is usually our goal - to preserve items for use with researchers, classes of students, and perhaps in exhibitions. 


Wednesday, February 17, 2021

Too Much Mending, Too Little Time

L: Bound cello music score, R: Detail of damaged cover

This 1917 volume of bound scores, from the collection of Luigi Silva (1903-1961), is part of the Cello Music Collection in the Martha Blakeney Hodges Special Collections and University Archives at UNC Greensboro. It is part of a set of several works bound together under the handwritten title Pezzi repertorio II (Repertoire Pieces II). This volume contains parts for a violin or violoncello and piano. The score also contains handwritten performance notes by Luigi Silva. Silva was a renowned musician as well as a teacher and scholar of the violoncello. To learn more about Luigi Silva, please visit the Luigi Silva Musical Score Collection and Personal Papers.

Damage to the cover on left and to the pages on right
Often, when we receive a damaged item in Preservation Services, we do not know the exact cause of the damage. This score is one such example. The front cover had been punctured by a sharp object, which caused damage through the cover and into the first 20-25 pages of the bound score. Because so many pages had been damaged, it was going to be a time-consuming task to mend the same hole or loss on all of the 20 or so damaged pages. 

Mending this type of damage requires careful consideration of materials. Though the score is unlikely to be used in performance any longer, it was necessary to ensure that the mend would remain flexible as the pages are turned by researchers or perhaps when the book is shared with a class. Mending tissues are often selected based on the type, age, and condition of the paper being mended. For example, a very brittle paper mended with a thick piece of Japanese paper would simply break again next to the mend, as the mend would be stronger than the paper itself.

L: Hole as it appears on one of the first pages, vs.
R: Hole as it appears on the last damaged page
The paper in this score was relatively stable in condition, so brittleness was not a concern. However, adding a Japanese tissue mend to each of the 20 or so damaged pages would quickly build up thickness in that one area that could be problematic in the function of the book. For that reason, a thin Japanese paper was used along with rice starch paste to mend each of the holes.

Another consideration in completing this type of mending is how much time is involved. Often in Preservation Services, we are able to go beyond basic repair and even restore a damaged item to close to its original condition. However, we must balance how and how often the item will be used in the future with how much time we can invest in its repair. Not every item warrants a full restoration.

L: The hole being repaired, R: Applying pasted tissue to the hole

In this case, the item may be used in the future by researchers, in a class, or in an exhibition, so it was necessary to spend more time in the conservation process rather than simply providing a protective enclosure for storage. To that end, in projects such as this one it becomes necessary to save time whenever possible as there are so many conservation projects in the queue. Not only do we conserve items in Special Collections and University Archives, but we are also tasked with preserving materials in the general circulating collections of Jackson Library as well as those in the Harold Schiffman Music Library on campus.

When time and space are not as much of a concern, or when working on a flat item such as a letterpress printed broadside, it would be common to allow each mend to dry under blotter and weight while working on another project at the same time. In the case of repairing this bound score, a quicker method was employed. A small travel iron on a very low heat setting was used to quickly dry each mend before moving on to the next one. So, mending more than 20 pages took a fraction of the time it might have. Applying heat is not always ideal, so the conservator must consider the type of materials being mended and what impact heat may have on the item.

L: Ironing mend to dry it quickly, R: Finished mend

For each mend, a substrate is placed under the page being mended. It consists of a piece of release paper (like parchment paper you might use in baking), which is layered over a cotton blotter on top of a scrap of book board. Rice starch paste is applied to a thin piece of Japanese paper torn to size and applied to the area of the page needing repair. A Teflon folder is used to press and smooth the tissue onto the paper being mended. Then, another piece of release paper is layered on top of the mend and the iron is used to apply heat to quickly dry the paste. The blotter underneath helps to absorb the moisture from the paste. In this way, 20 or more pages can be mended in a fraction of the time. Likewise, because a very thin tissue was used, the "stack" of mends did not build up into a thickness that might have impeded the cover from closing completely. So, the problem of too many mends and too little time was easily resolved.

As you see pictured below, the cover was also mended with a black Japanese paper. Two years ago, we posted another blog entry about mending the corner of a cello music score much like this one. Please click HERE to read about that repair.

Detail of repaired cover


Thursday, November 12, 2020

Resewing & Restoring Endbands

If you have followed our blog, you may remember that we have mentioned resewing endbands previously as part of a full binding restoration. Endbands, sometimes referred to as headbands, are attached to the spine of a book at both the head and tail and rest between the spine and the cover.

Handsewn endband

Endbands can be structural components of a binding as well as decorative elements. They may also simply be aesthetic with no real substantive support to the book. There are many different types of sewn and "stuck-on" endbands. Stuck-on endbands may be machine-made or handsewn separate from the book and adhered to the spine of the book with adhesive. Sewn endbands, rather than just being glued to the spine, are mechanically attached to the spine with thread. Periodically, as an endband is sewn, it is anchored to the spine of the book by a loop of thread that goes down into a section of pages, through the spine, and back up to loop around the endband again. (See picture below.)

Image of several textblocks with handsewn endbands with anchoring threads sewn through the spine of each textblock
Aatu Dorochenko, CC BY-SA 4.0 via Wikimedia Commons

Sewn endbands may be sewn with a single color of thread or they may have several colors interwoven to create a decorative pattern. One of our favorite reference books for sewing many different kinds of endbands is Headbands: How to Work Them by Jane Greenfield and Jenny Hille. Endband sewing patterns may vary by historical time period or by geographical location, or both. The most common structure we use is a single core endband with a bead on the edge or the spine. The thread wraps a single core material, such as linen cord, and a bead, or decorative weave or braid, is created as the cord overlaps itself.

Stuck on endband material
Stuck on endband

Stuck-on endbands come in many varieties as well. In some cases, an endband may be handsewn as described above but separate from the book and later adhered to the spine with adhesive. In such a case, the endband serves more as decoration than as structural. Many mass-produced hardcover books have stuck-on endbands that have been machine woven to appear similar to handsewn endbands. This type of endband is sold in rolls that can be cut to length based on the width of the spine. (See picture above.) Stuck-on endbands can also be made by adhering cloth or paper around a core of cord, which is also cut to length based on the spine width and adhered with adhesive. (See picture below.)

Handmade stuck-on endbands
paper or cloth wrapped
around linen cord
Handmade stuck-on endband


Often, when completing more extensive book restoration projects, we need to resew endbands. In many cases, there are remnants of endband threads still attached to a book indicating that one was once present. Or, we will find one endband intact and the other missing and needing a replacement. It is nice to find at least one of the endbands still intact so that we can model the replacement from it. However, if both endbands are missing, we have to do some guesswork based on the historical time period of the binding for what style and colors of endbands might have been used originally.

Left: linen cord core for an endband
Right: linen cord wrapped in paper

If we have an endband to use as an example, we try to match it as closely as possible. One step of that process is to use a core material that is close to the diameter of the original. Endbands may be sewn on linen cord, leather, parchment, rolled paper, or other materials. We most often use linen cord, though at times we have to adjust the diameter of our cord by rolling it in paper (see image above) to more closely resemble the original. Then, we try to match the thread and pattern of the original endband as we resew a new one.

Partial replacement of a sewn endband

Recently, a book had part of the original endband still attached but about a third of it was missing. Because the remaining portion was in relatively good condition and securely attached, a partial endband was created to supplement the original. This proved somewhat challenging in that a new core needed to become an extension to the existing core. Fortunately, the exiting core was the same diameter as our linen cord. The new cord was consolidated (stiffened and compacted with adhesive) and tipped onto the existing cord with a drop of adhesive. Once dry, a the winding threads were wrapped in the same pattern around the new cord and it was periodically anchored to the book by sewing down through a section of pages and out through the spine. It can be a challenge matching thread colors at times. In the case of this repair, the original thread was quite discolored from age and dust, so it may have been a more successful match if a darker thread was used rather than the cream colored thread pictured. Hindsight is always 20/20, no?

Resewing an endband

Sewing endbands is both tedious and time-consuming, but it is also very rewarding as it provides both structural support to a binding as well as aesthetic beauty. It can be somewhat meditative as well as it is a repetitive task that requires a great deal of focus - perfect work for 2020.

Tuesday, April 7, 2020

Super Size Me: The Book Conservation Variety, Part 3 (of 3)

In our final post of this three part series about this conservation treatment, we will review covering the book in leather, reapplying the original label, and blind tooling a panel on the front and back covers. Previously mentioned in Part 1, The Royal Commentaries of Peru (RCP) by Garcilaso de la Vega (1539-1616), published in 1688, arrived in Preservation Services having already received a number of repairs. For that reason, it was determined that the best way to stabilize and improve the function of this book was to remove it from the original binding and rebind it in a new leather cover.

The Royal Commentaries of Peru before and after treatment

And, as mentioned in Part 2, there are many steps to preparing a book to be covered in leather. In the case of RCP, those steps included mending almost all of the pages, resewing the text sections on cords, adding new endpapers, resewing endbands, and several other time-consuming tasks. (See Part 1 and Part 2 for those steps) This is the sort of work we very much enjoy doing but for which we do not always have the time.

The dampened leather is adhered first to the spine
and worked around the raised cords before
smoothing onto the covers.
One of the first steps for covering a book in leather, after the many steps mentioned in Parts 1 and 2 of this series, is to pare the leather. A piece of leather, in this case, calf leather, is cut to the size of the book plus about an inch extending beyond the head, tail, and fore edge of the book (top, bottom, and edge opposite the spine). The leather is then pared with a special knife to bevel or thin the edges to aid in turning the leather in around the cover boards. For a quick video on what leather paring is, click HERE to see conservator and toolmaker Jeff Peachey (to see Peachey's tools, click HERE) demonstrate on a scrap piece of leather. Once the leather is pared, paste is prepared and all the necessary tools are set out in easy reach of the binder. The binder needs to work fairly quickly once the leather is pasted out, so it is helpful to have all the appropriate tools at hand.


The leather is moistened with water using a soft sponge or cotton on the hair side (the side that had hair on it when it was sourced from an animal). On the flesh side of the leather (the side that faced the inside of the animal from which it was sourced), paste is applied, scraped away, and reapplied in stages. The moisture from both the water and the paste makes the leather more malleable as it is applied to the book. However, it also makes the leather susceptible to scarring or bruising while it is dampened, so the binder must take care not to damage the leather in the binding process.

The book rebound in new leather before the decorative panel was inscribed

The leather is first applied to the spine of the book and worked down around the raised cords. From there, it can be laid down on each cover. The binder then works at the head and tail of the book, with the covers open and the textblock upright and perpendicular to the table surface, to turn the leather in around the edges of the boards and form the endcaps (a bit of leather that protrudes at the head and tail of the spine and curves over the text minimally to protect the end band). It is difficult to document covering a book in leather while doing so as the binder must stay focused and work quickly. For a rough overview of the process, click HERE to watch a video of covering a book in leather.

The original label was readhered to the new leather spine
After the book was covered in the leather and had ample time to dry, the original label (that was lifted as the book was removed from its original cover) was reapplied. While the facing tissue is still on the label, the label can be adhered to the new spine leather. Once dry, the facing tissue was removed with a thin coat of Klucel-G (a leather consolidant that worked like an adhesive to hold the tissue to the face of the label without damaging it).

The final step was to create a panel pattern on the front and back covers similar to the design on the original covers. A simple way to create a design on leather is to take advantage of the issue mentioned earlier: leather is easily scarred or bruised when dampened. After determining the basic rectangular design, a cardstock template was created to simplify the process of keeping the design parallel to the edges of the book. The cover was dampened, the template laid in place, and a bone folder was used to impress the lines in the damp leather. Once dry, the lines appear slightly darker because the leather was purposefully bruised with the folder while damp. Once one cover was dry, the book was flipped over and the same design was applied to the back cover.

A template was used as a guide to impress decorative lines on the cover while the leather was dampened

After its extended stay in Preservation Services for stabilization and rebinding, The Royal Commentaries of Peru was returned to our Rare Books collection and will be available for use by researchers and classes for many years to come. To read more about the process of treating this book, visit Part 1 and Part 2 of this three part series.

The cover leather was dampened to impress the lines. On the left,
it was still very damp. On the right it was beginning to dry

Tuesday, March 24, 2020

Super Size Me: The Book Conservation Variety, Part 2

In Part 1 of this series, we introduced a project to conserve The Royal Commentaries of Peru (RCP), a large leather volume. The book had to be disbound and required extensive mending prior to resewing the textblock. Please click HERE to read Part 1 of the series.

The book was sewn on cords, including new endsheets yet
to be trimmed. The spine will be consolidated with paste
and rounded to allow it to open properly.
In Part 2, we will review sewing the endbands, board preparation (getting the cover boards ready to attach to the textblock), lacing the covers on, and lining the spine of the book in preparation for covering the book in leather.

Once the textblock leaves (single sheets) were guarded back into folios (two leaves mended together at the spine edge), and seated one inside the other to create two folio signatures (a gathering of several printed folios seated one inside the other), they were sewn together on cords. Next, the endbands needed to be sewn.

The original endbands were no longer attached when this book arrived in Preservation Services, so an endband style appropriate to the time period of the original printing of the book was selected.

Endband sewing in progress. The thread wraps
around the cord core and overlaps itself to
create the bead indicated by the red arrow.
A single-color primary endband (an endband that is tied down through the sections of the book to anchor it) sewn on a core of consolidated linen cord with a bead on the edge was selected. The term bead refers to the visible braid or twist of thread that sits between the textblock and the endband itself as indicated by the red arrow in the photograph of the endband sewing in progress.

The endbands are not integral in connecting the textblock pages together, but they can add additional strength and stability. There are many styles of endbands and many are much more decorative than this design, though it was selected in an effort to more accurately reflect endbands of the time period.


The endband after the book has been covered in leather.


With the endbands sewn, a series of linings were applied to the spine of the book. Each lining may serve multiple functions, but each will assist in consolidating the pages together at the spine edge and providing support as the book is opened and closed. Linings that are too thin may allow the book to flop open too easily. Linings that are too thick can restrict the book from opening fully. In this treatment, three spine linings were applied. First, a release layer of Japanese tissue and rice starch paste was applied to consolidate the spine as well as provide a reversible layer for the rest of the spine linings to be removed from the spine should a future conservation treatment be necessary. Paste can be remoistened to loosen the first layer as opposed to applying a more permanent adhesive like PVA mentioned in Part 1 of this series of posts.

Left: Before release lining is applied. Right: After release
lining of Japanese paper and rice starch paste is applied.
Second, an extension lining of Irish Linen fabric is attached to the spine and molded around the cords. Irish linen is used because it remains quite flexible and malleable once pasted, can be smoothed easily to dry without ridges, and it contains less acidic impurities that would cause it to break down over time. This lining is called an extension lining because there are flaps of fabric that extend onto the textblock beyond the width of the spine. Those extensions will eventually provide extra strength for the hinges as the book is opened and closed. If you look at the photographs closely, you will see that the linings extend just to the edge of the endbands at the head and tail. This creates another support attachment for the endbands.

The third and final spine lining prior to covering in leather was a layer of thin leather pasted hair side toward the spine (the smooth side rather than the suede-like side is pasted down). The leather, once dry, can be sanded to disguise ridges on the spine. If you look closely in the photograph, you will see ridges on the spine that have not yet been sanded away. Likewise the leather is darker in the center because it was still wet with paste.

Left: Irish linen extension lining is being applied. Right: thin layer of leather applied, which will be trimmed to the
height of the book and sanded to create a smooth spine once it is dry. The darker area is where it is still wet.


The next step after spine linings and sanding was to prepare the cover boards. Unfortunately, most of the steps of board preparation were not documented in photographs. For those with some bookbinding knowledge, two thicknesses of .80 board were laminated to achieve a board thickness appropriate for the textblock. The interior of the boards were lined with text weight paper to counteract the pull of the leather to be attached on the outside. When the leather is moistened with paste during covering, it will shrink as it dries, which has a tendency to cause the boards to flare outward rather than bending slightly inward to "cup" the textblock. This inner lining of paper helps to counteract the pull of the shrinking leather.

Left: Punching holes to lace cords through, pencil lines roughly indicate where channels will be carved,
red arrow indicates back cornering (trimming board to accommodate the thickness of leather in the hinge
as it opens). Right: Fraying the cords in preparation to lace through the boards. The tips
will be pasted into points to make it easier to thread through the holes.


Once laminated and lined, the boards undergo further refinement. The outer head, tail, and fore edges of the boards are sanded to create more of a gentle slope from the center portion of the board to the edges (imagine a more subtle version of a pillow form). Likewise, the boards are placed in position and marked according to the location of the cords extending from the textblock. Holes are drilled along with some small channels from the holes to the edge of the board. In the photograph of punching holes into the boards, the pencil lines roughly indicate where the channels will be carved. These channels will accommodate the cords once they are laced through the covers.

View of the inside cover once the cords have been
laced through, but not yet trimmed and pasted flat.
The cords are first frayed before lacing through the cover boards. The fraying allows the binder to flatten the cords into the channels as well as to the lay the ends flat on the inside of the boards so that there are no lumps under the leather on the outside or the endsheets on the inside. Once the cords are frayed, a bit of paste is applied to the ends and dried to shape them into points that can be threaded through the drilled holes. The photograph to the right shows the cords on the inside of the cover board before the pasted points have been trimmed off. The shorter tips extending from the boards are then repasted and smoothed flat to the boards, which results in securing the board as well as disguising the lump of cord. Endsheets will eventually cover the exposed, flattened cords.

There are many steps to preparing a book to be covered in leather. Those steps are referred to as "forwarding". Sometimes, the leather covering is also included in the term forwarding depending on which binder you ask. Please stay tuned for a post about that final step in the process.

In Super Size Me: The Book Conservation Variety, Part 3, our final post about this conservation treatment, we will review covering the book in leather, reapplying the original label, and blind tooling a panel on the front and back covers.